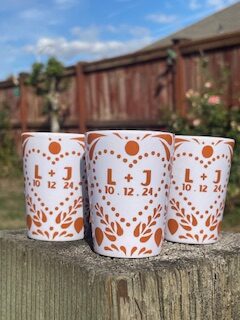
Transferring a vinyl design onto a shot glass is a fun and creative way to personalize glassware. Whether you’re making custom gifts or crafting for your own collection, follow these steps to ensure a smooth and successful transfer. I personally made these as a wedding favor!
Materials Used:
-Shot glasses
-Vinyl
-Cricut
-Transfer Tape
-Application Card
-Weeding Tool
-Cutting Mat
-Ruler or Tape Measure
-Rubbing Alcohol
-Lint-free Cloth
Steps:
1.Measure Your Shot Glass
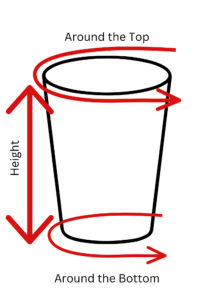
To ensure your vinyl wrap fits perfectly, start by measuring your tumbler accurately. Use a flexible measuring tape to gauge the circumference and height of your tumbler. If it has a tapered shape, measure both the top and bottom circumferences. Record these measurements, as they will be essential for creating your design template.
Important Measurements to Record:
Measure around the top of the shot glass (widest part)
Measure around the bottom of the shot glass (narrowest part)
Measure from top to bottom to get the height of the shot glass

2. Make a Template on Cricut Design Space
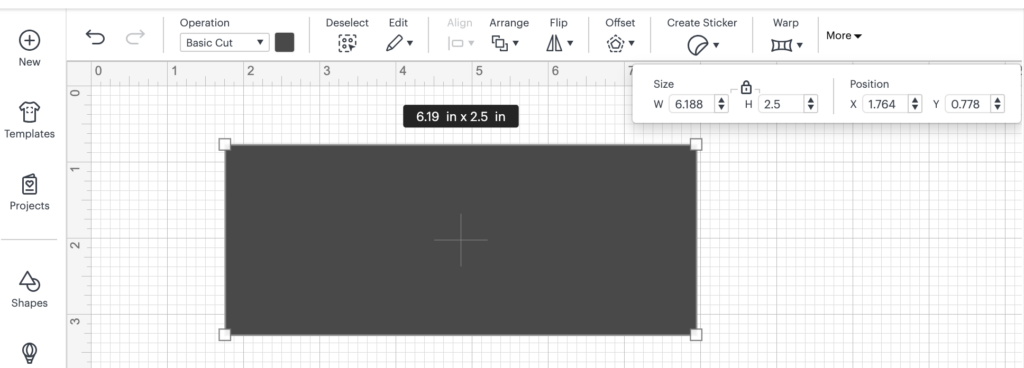
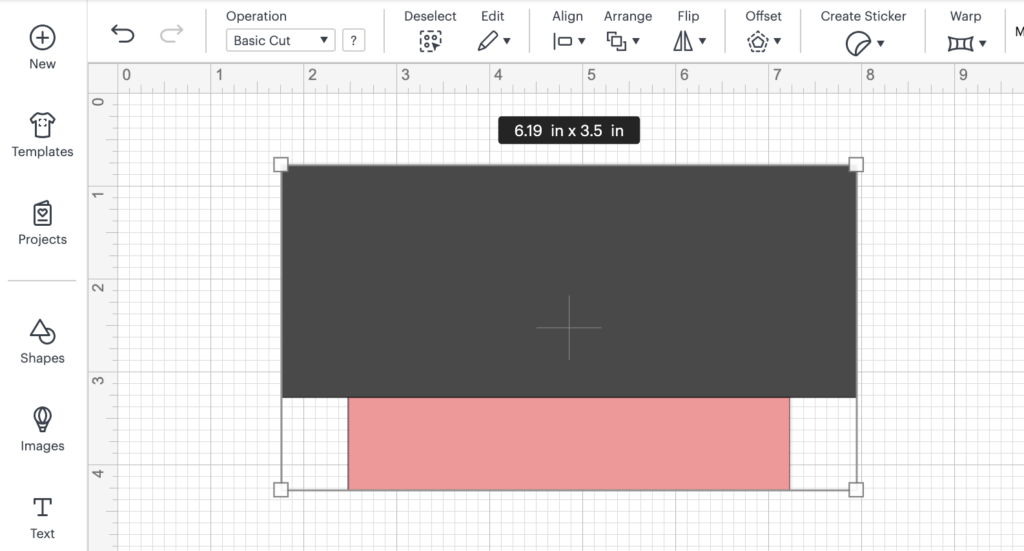
Add a square on Cricut Design Space, adjust the square to match your measurements, the widest part of the shot glass will be your width and then add the height of your cup.

We will need to Add a second square to cricut design space to match the narrowest part of the shot glass. (Tip: Make it a different color to be able to distinguish!) The width should be the narrowest measurement of the shot glass and the height doesn’t matter but I made it 1 inch.
Select both squares and “align” then “center horizontally” button.

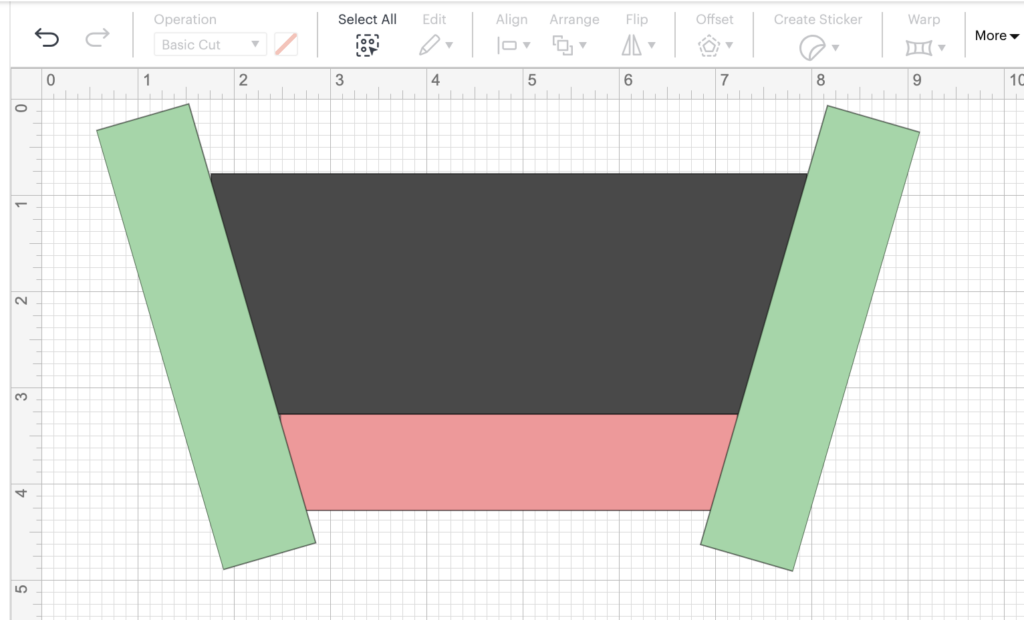
Now you will need a 3rd rectangle and you can copy and paste the second square you have created to act as the 3rd rectangle. (Tip: Make it a different color from the 1st and 2nd square.) You will need to angle your rectangle to be on the top corner of the 1st rectangle and the top corner of the 2nd rectangle. Once it is aligned you will copy and paste your 3rd rectangle and move it over to the other side, then flip it horizontally this will give you the exact same angle.

At this point you may go ahead and delete the 2nd rectangle as it is no longer needed.
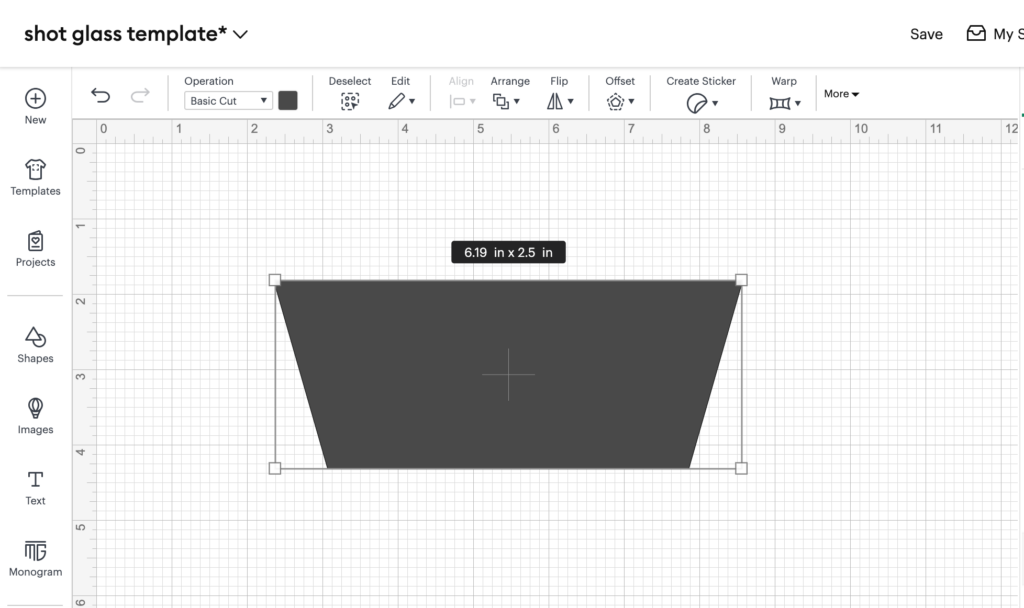
Select all 3 rectangles and go to the combine button and click “subtract”. This will be the template for the shot glass!

3. Design Via Canva
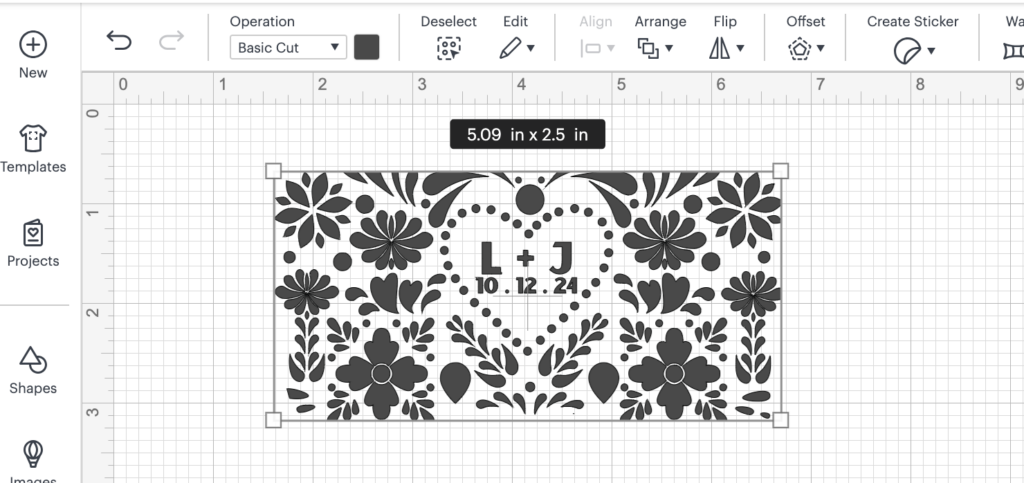
To start your design process on Canva, first set up a custom size. I made my dimensions slightly larger than the shot glass to have a little extra room for the design. Next, explore the vast array of design elements available. For a vibrant and culturally rich aesthetic, search for “Talavera” elements. Experiment with different colors, shapes, and layouts until you find a combination that truly reflects your artistic vision and satisfies your creative intentions. Finally, after fine-tuning your design, download it from Canva. Be sure to select the option for a transparent background to ensure seamless integration when you transfer your design into Cricut Design Space.

4. Upload to Cricut Design Space
Next you will need to upload your design from Canva on to Cricut Design Space. Adjust the design on top of the template (the one created in step 2) and you will either make it bigger or smaller until it is your desired placement on the template. It won’t be seamless placement since the shot glass is a tapered shape. Once you have the desired look you will want to select the design and template together, then go to “combine” and then “intersect”.
If there are any edges that were cut off and left really small pieces or pieces you want to get rid of then you can go to the “shapes” button and add a circle. Adjust the size of the circle. Position the circle over the areas that got cut off and repeat on other areas as needed. Once you have all those pieces covered go ahead and select it all then “combine” and then select “subtract”. Now your template is ready to cut.

5. Cut on “Premium Vinyl” Setting
Now that you are ready to cut your design, Start by clicking on the “Make It” button in Cricut Design Space, which leads you to the cutting mat preview screen. Choose “Premium Vinyl” as your material setting to ensure a clean cut, and adjust the cutting pressure to “More” for thicker or intricate designs. Next, prepare your 12×12 vinyl sheet by loading it onto the cutting mat, ensuring it adheres smoothly to prevent any movement during cutting. Optimize your layout by arranging the designs efficiently, fitting up to eight, depending on their size. Once your cutting mat is ready, insert it into the Cricut machine and press the “Go” button to initiate the cutting process.
6. Cut them Down to Further Rectangles
Once the machine has finished cutting the design you will want to further cut them into rectangles with scissors and remove any excess vinyl.
7. Apply the Transfer Tape to the Vinyl
Carefully place the transfer tape over your vinyl design. Use an application card or credit card to press down firmly, ensuring that the tape adheres to the vinyl. This will help in lifting the vinyl from its backing. Also I like to turn it upside and also apply pressure on the back before removing the backing.
Slowly peel the backing paper away from the vinyl, ensuring that the vinyl design sticks to the transfer tape. If any part of the design remains on the backing, press the transfer tape back down and try again.
8. Weed out Excess Vinyl
Weeding out excess vinyl is a crucial step in the design process. To ensure a successful weeding experience, begin by gathering the right tools, such as a weeding tool, tweezers, and a craft scissors, which can be particularly useful for intricate designs. It’s best to start at the corners by gently lifting a corner of the vinyl with your weeding tool, taking care not to disturb the parts of the design you wish to keep. As you proceed, work slowly and carefully, peeling away excess vinyl in sections to prevent any tearing or damage. Applying light pressure can help you effectively remove smaller or more intricate pieces. Finally, once you’ve removed the excess, take a moment to inspect your design for any missed pieces.
9. Prepare the Shot Glass
Clean the shot glass thoroughly with rubbing alcohol and a lint-free cloth. This removes any oils or residues that might prevent the vinyl from adhering properly.
10. Position the Design on the Shot Glass
Align the vinyl design on the shot glass, ensuring it’s positioned exactly where you want it. The transfer tape should help you keep the design steady.
Once positioned, press the vinyl firmly onto the shot glass using the squeegee or credit card. Start from the center and move outwards to eliminate any bubbles.
11. Remove the Transfer Tape
Slowly peel away the transfer tape, ensuring the vinyl design stays adhered to the shot glass. Take your time to avoid lifting any part of the design.
12. Optional: Seal the Design
For added durability, consider sealing your design with a coat of clear glass sealant. This step is optional but recommended for designs that will be frequently washed.
Enjoy your personalized shot glass with its unique vinyl design! Whether for decoration or use, your custom glassware is sure to impress.
Follow me on Tiktok @mayradesigns to see a quick clip of me creating these shot glasses.
