Throwing a Bluey-themed birthday party is sure to be a hit with kids who adore the adorable Bluey Heeler pup. To make the celebration even more special, consider creating personalized Bluey birthday bags with custom stickers that fit the theme and color scheme of the birthday party. Here’s a guide to help you craft these delightful party favors.
Materials Needed
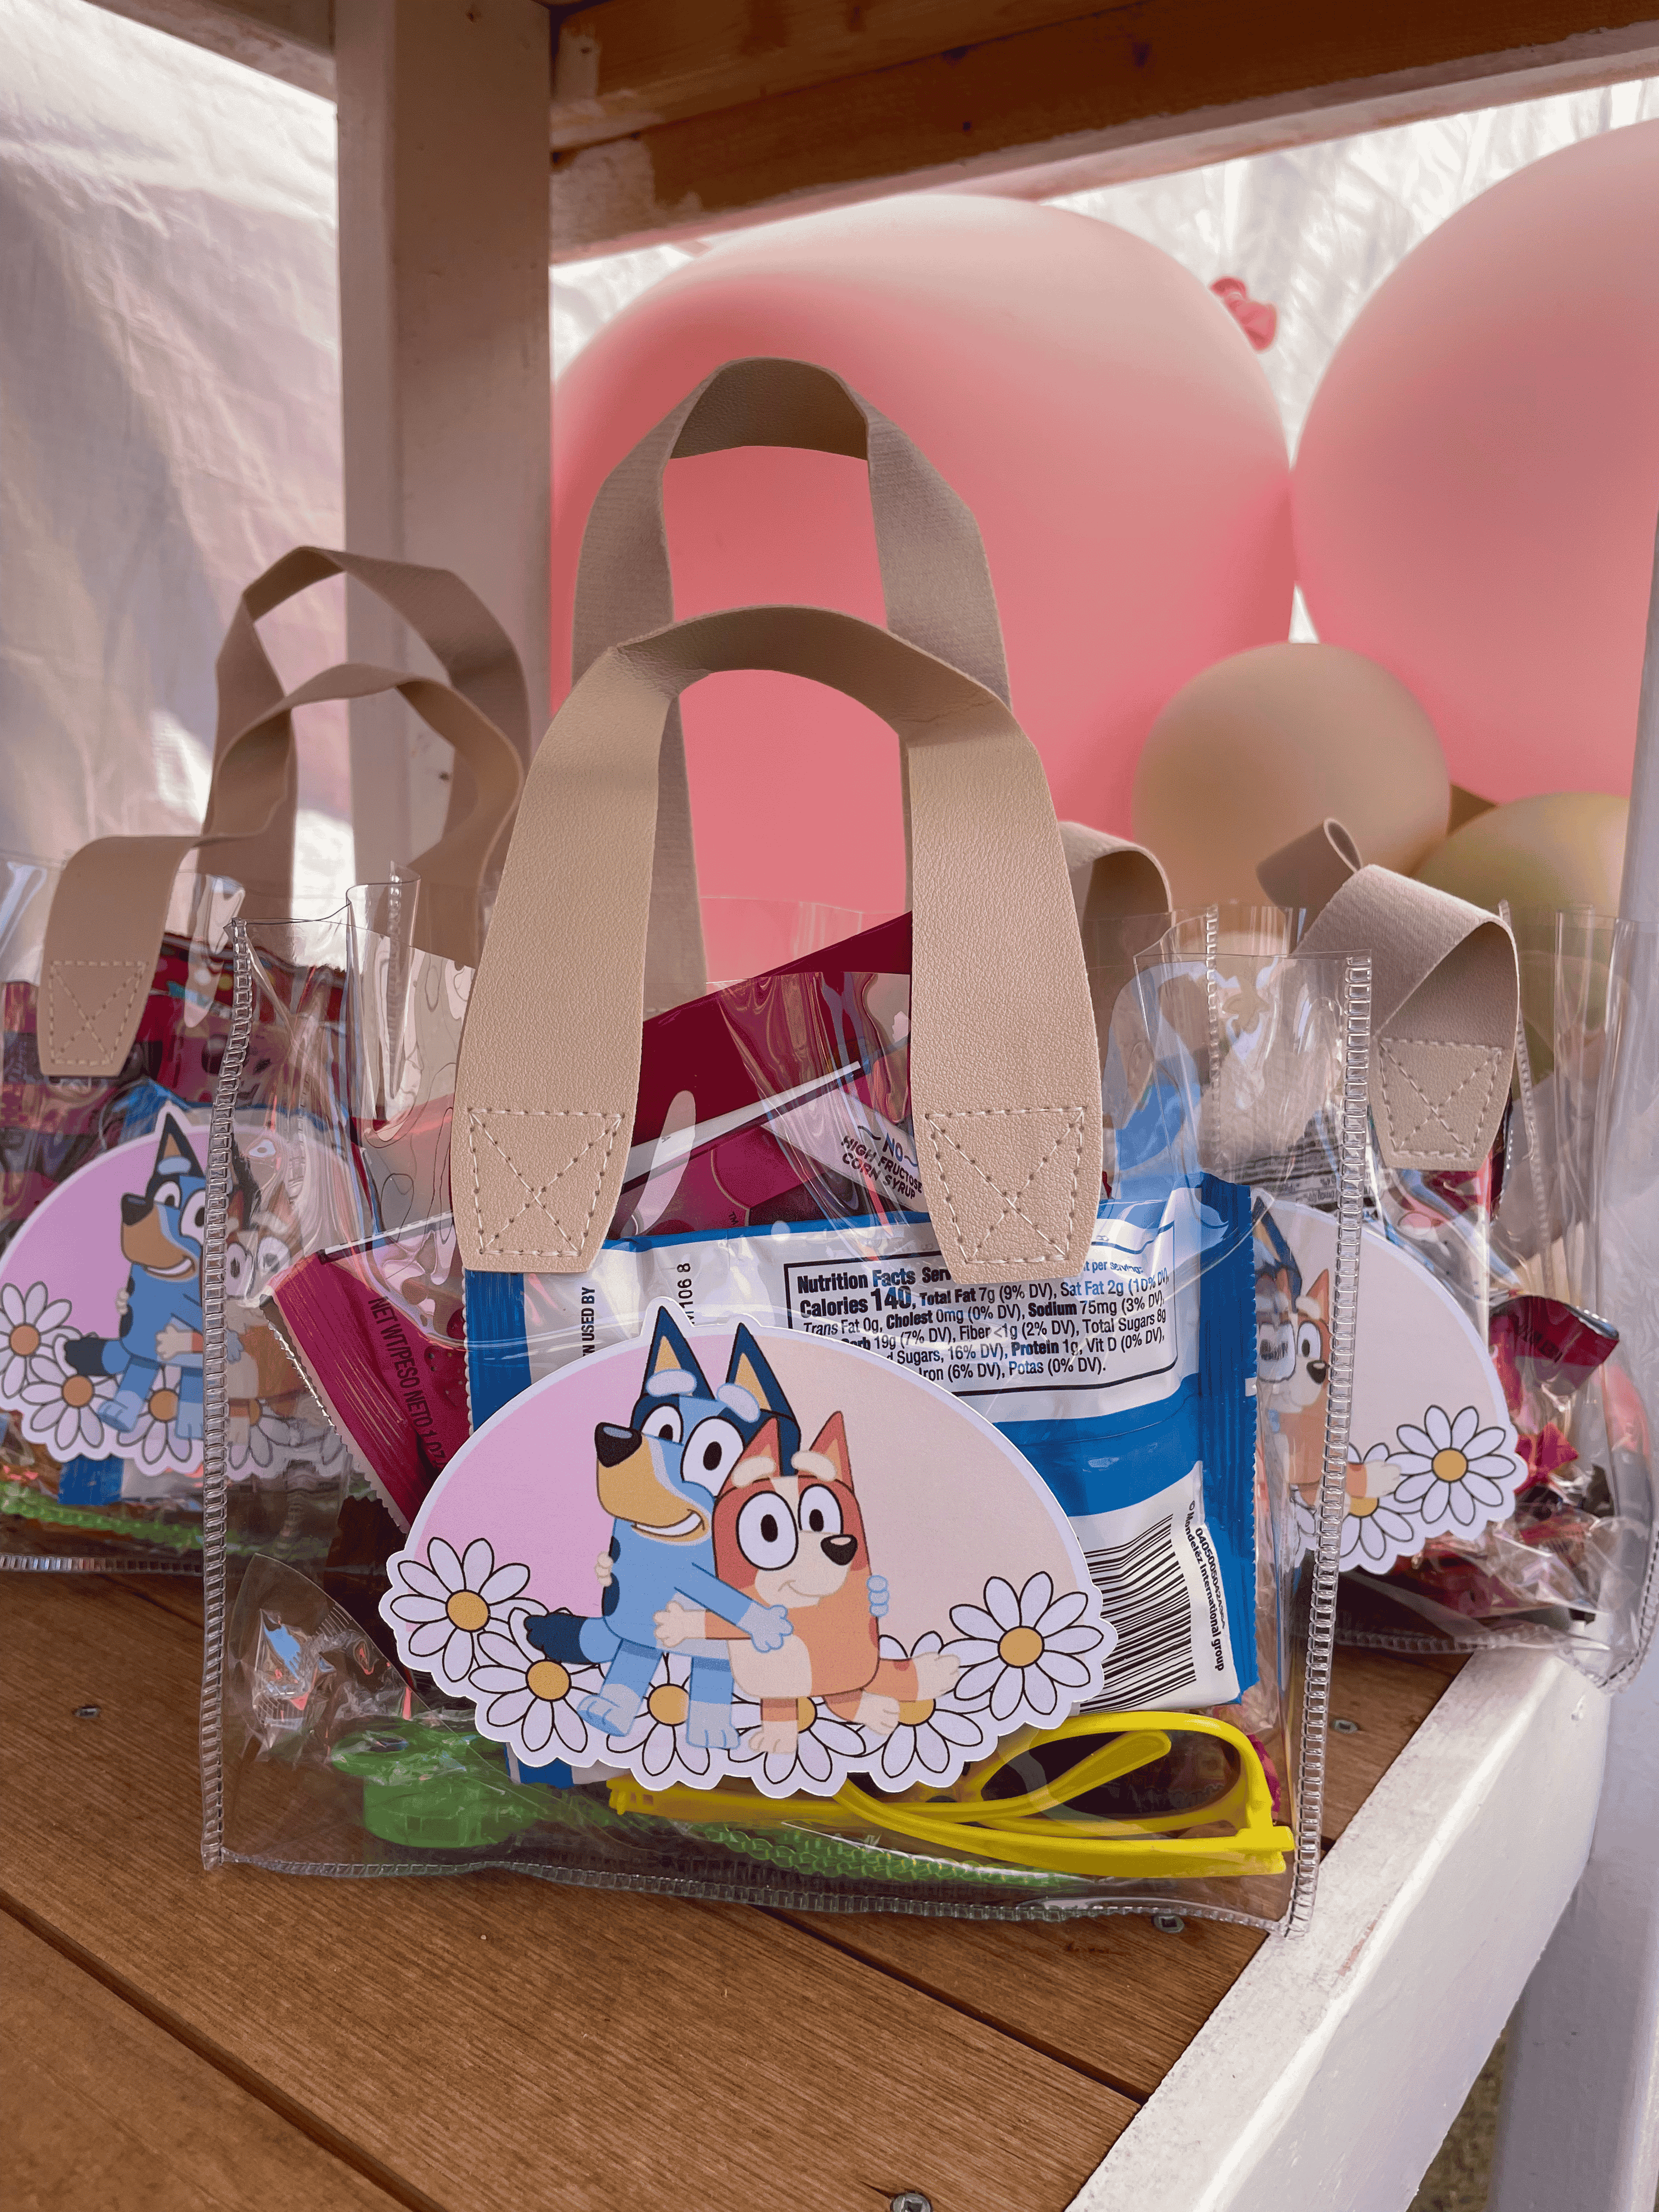
- Gift Bags: I went with a clear gift bags purchased from Amazon
- Sticker Paper: This will be used to print your custom Bluey stickers.
- Printer: Ensure it can print on sticker paper.
- Design Software: Use a simple graphic design tool like Canva or Adobe Spark.
- Cricut Cutting Machine
- Cricut Design Space
Step 1: Gather Your Bluey Images
Before you begin, collect Bluey images or SVG files that you want to use for your stickers. You can find these images online or create your own using graphic design software. Make sure the images are of high quality for the best results. I like to design and play around with different elements on Canva. If you’d like to make it more personalized you may add text like “Happy Birthday [Child’s Name]!”. I added daisies to my design to stick to the theme I was creating. Once you are satisfied with with your design, download image with a transparent background
Step 2: Upload Images to Cricut Design Space
- Open Cricut Design Space on your computer.
- Select “Upload Image” and upload your design
- Adjust the size of your image that would best fit your gift bags
- Arrange your designs on the canvas to maximize the use of sticker paper.
Step 4: Print Your Stickers
- Load the sticker paper into your printer.
- Click on the “Make It” button
- Follow the prompts to print your design on sticker paper using your home printer. Ensure your printer settings are adjusted for high-quality printing.
Step 5: Cut Your Stickers with Cricut
- Place the printed sticker sheet on your Cricut mat.
- Load the mat into the Cricut machine.
- Select the material type as “Sticker Paper” and adjust the blade settings if necessary.
- Click the “Go” button to begin cutting.
- Once cutting is complete, carefully peel off the stickers from the mat.
Step 6: Apply Stickers To Your Bluey Birthday Bags
- Take your goodie bags and arrange the Bluey stickers on them as desired. You can place them in the center, at the top, or create a pattern.
- Press down firmly to ensure the stickers adhere properly to the bags.
Step 7: Add Goodies
Fill the decorated bags with party favors and treats that coordinate with the Bluey theme. Consider including small toys, coloring sheets, or snacks that the children will enjoy!
Final Touches
- Arrange the Bags: Display them on a table at the party entrance or hand them out as guests arrive.
Creating Bluey birthday bags with custom stickers not only enhances the party theme but also provides a memorable keepsake for young guests. Enjoy the process of crafting these delightful party favors and have a fantastic Bluey-themed party!
Follow me on TikTok @mayradesigns to see a quick video of me creating these!